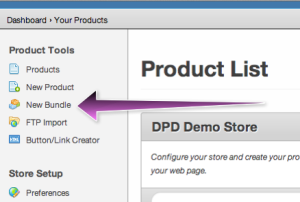
One of the most frequent questions we get at the helpdesk is how to set up and sell a preorder product. We specifically designed many DPD features, working in concert, with smooth and easy selling of pre-order products in mind. This in-depth guide will explain step-by-step how to create and run a pre-order sale.
There are 4 basic steps to selling a pre-order product:
1. Create the pre-order product in DPD before you have your product file
2. Sell the pre-order product on your website
3. Release your actual product on launch day
4. Send the actual product to the previous buyers of the pre-order.
This guide assumes you have a DPD account with a store already set up with a payment processor and ready to go. If you have not created a DPD account and completed the new store setup wizard to activate your first store, please do so before moving on.
Create The Pre-Order Product in DPD
The first thing you need to do is create a product in DPD for your pre-order. This product is like any other product in DPD, except instead of delivering the actual product file the customer is buying it will deliver a message thanking them for their pre-order.
1. Log in to DPD
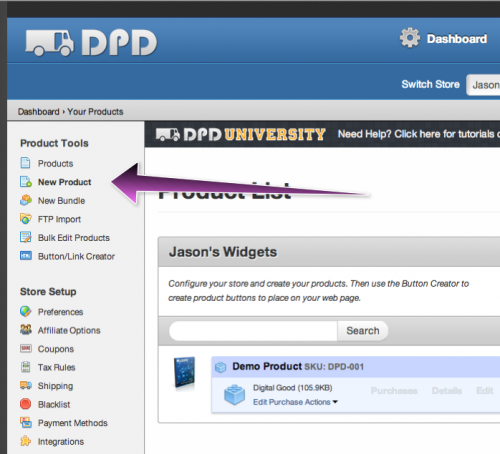
2. Go to New Product in the left menu to begin creating your pre-order product
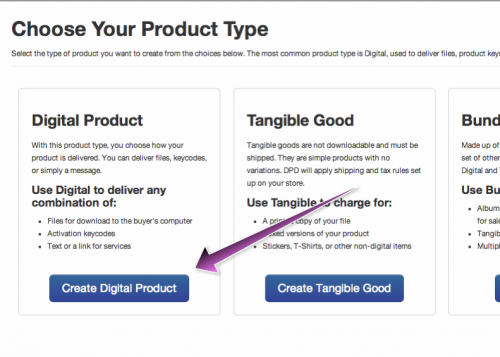
3. Select Digital Product as the type.
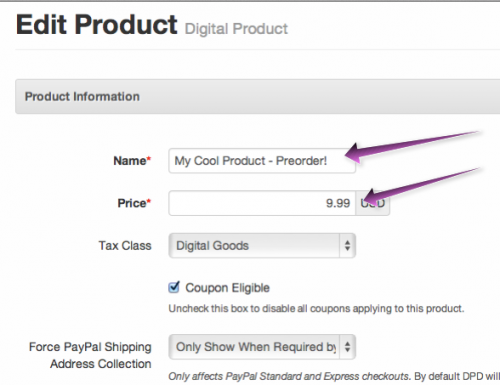
4. Set the name, price, image, and short description how you would like it to display to pre-order buyers and save to go to Purchase Actions.
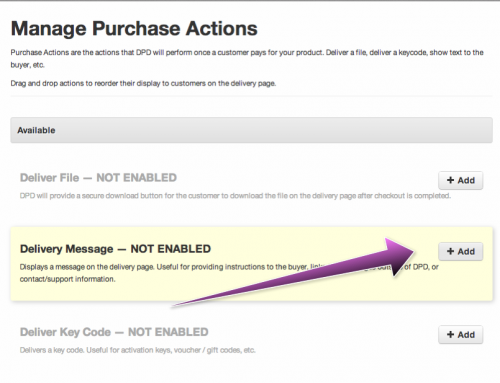
5. Purchase actions are where you define what DPD should do when a product is purchased. For most products, this is obviously where we would deliver a file or key. For this product, since the file is not ready yet, we’re going to set up a delivery message to be displayed to the pre-order buyer.
To do so, select “Add” beside the Delivery Message action.
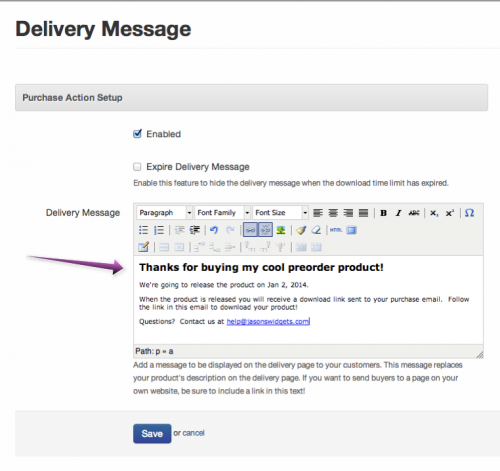
6. In the delivery message, add your own customer service message thanking them for buying, telling them when the product will be released, etc. This is completely up to you, but we recommend you give them a release date and let them know that a download link will be sent to the email they used to buy the product (either the email they enter during checkout or their PayPal email). Once you’ve crafted your message, save.
7. Once your delivery message is configured and is green (green means go!) then click the finish product button to complete product setup.
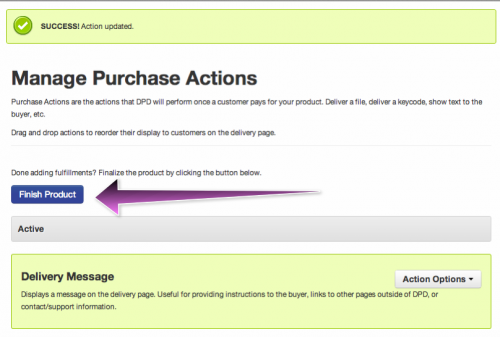
You have now configured your pre-order product in DPD.
This product doesn’t do much for the buyer- it just takes their money and tells them thanks for buying- but it’s a vital step in accepting pre-orders since later we’re going to use this same product to update all the pre-order buyers.
Selling Your Pre-Order Product
Selling your pre-order product is just like any other product in DPD- you generate the button code and then copy and paste it to your website.
1. From the Products list, go to the Buttons link for your pre-order product.
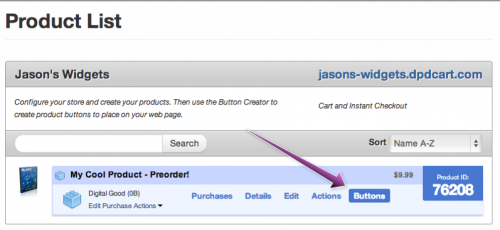
2. Select your button graphic and copy and paste the code to your website.
Once you place the button code on your website customers will be able to add the pre-order product to their cart (or instant checkout) and purchase it.
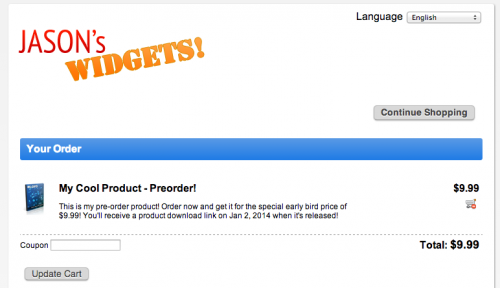
When the buyer completes their purchase, they’ll see the delivery message you configured during product setup thanking them for their order and telling them when they can expect their product to be delivered.
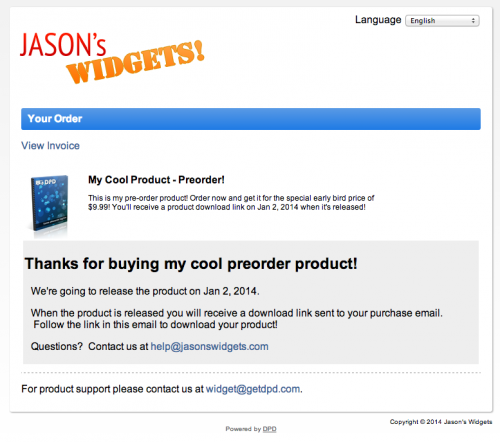
Meanwhile, behind the scenes DPD is tracking who bought the pre-order product, which will be very important when you’re ready to send out the finished product.

Launch Day! Adding Your Finished Product File
IMPORTANT! We’re not going to create a new product here- we’re going to edit the pre-order product we created before. This is important because we’re going to use this same product to send a product update to previous buyers to fulfill their pre-orders.
On launch day you need to do two things, the first of which is to update your pre-order product in DPD to be the full version of the product, including the actual finished product file people should receive when they buy the product.
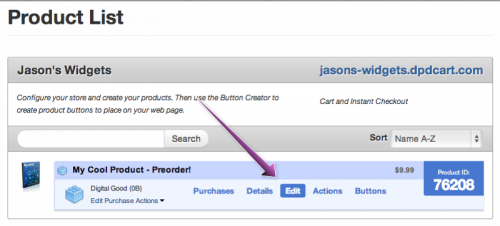
1. From the product list, edit your product
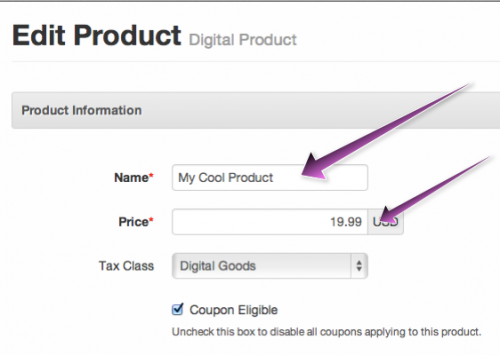
2. Edit your product name, price, and description to their regular, non-preorder values. This is what you want to display and sell the product for going forward now that the pre-order period is over.
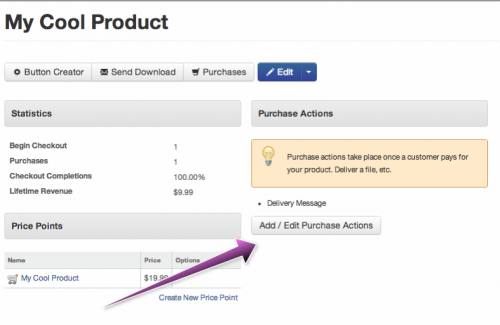
3. Once we edit our product we’ll be returned to its details page. From here we’re going to Add/Edit Purchase Actions and replace our pre-order message with the actual product file.
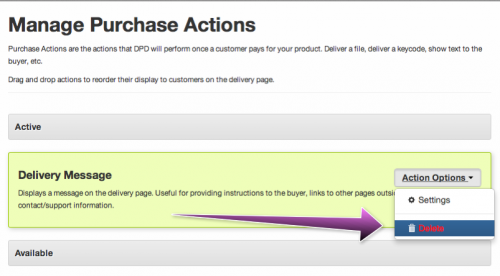
4. On the purchase actions page, we’re going to first delete the pre-order message by going to the menu for the deliver message action and selecting delete.
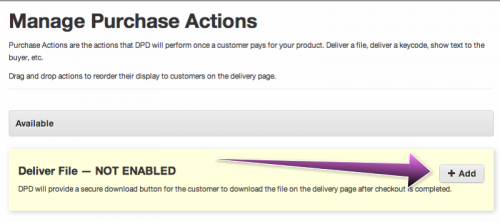
5. Next, we’re going to add a Deliver File action so all future buyers will receive the product file. You can add as many product files as you like.
6. On the Deliver File setup page, upload your product file and configure any file specific options (PDF stamping, friendly name, etc.) that you like, then save.
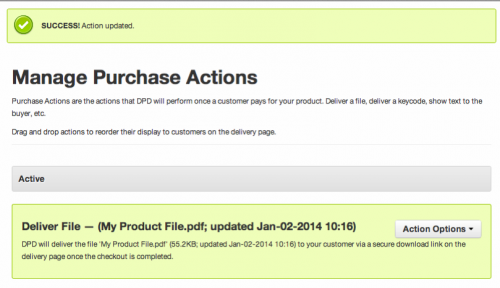
Your released version of your product is now active on your website!
Because we didn’t create a new product and simply edited the pre-order product there is no need to update the button code on your website. What was once a pre-order product that delivered a thank you message is now a full product that delivers the actual product file.
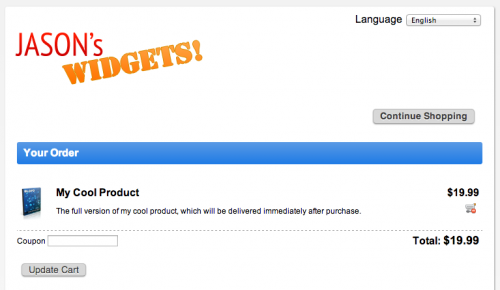
The same product appears as the full version product in the cart:
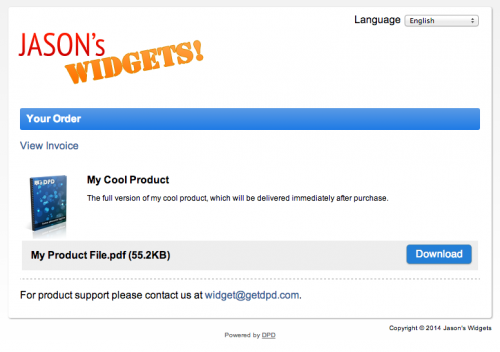
And when someone buys it they will get the product file you uploaded above instead of the pre-order thank you message.
Last Step: Send Pre-Order Buyers the Released Product
The final step in the process is fulfilling all the pre-orders so those buyers can download the product file now that its released. To do that, we’re going to use DPD’s built in Send Product Update feature.
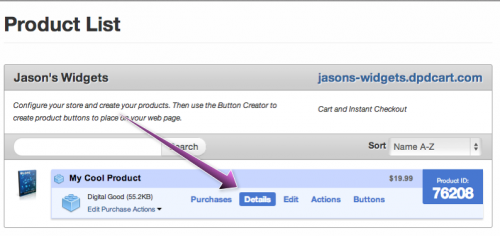
1. From the product list, click on the product’s Details link.
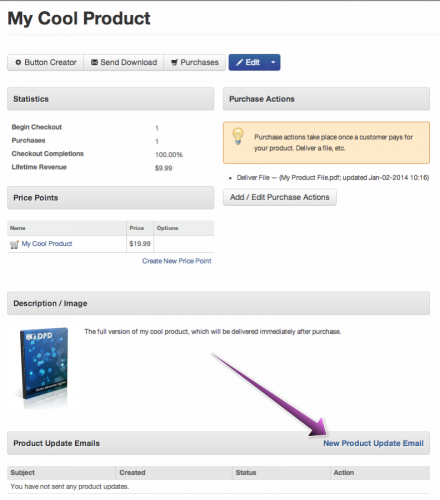
2. On the product detail page scroll down and select “New Product Update Email” to begin the product update process.
3. On the send product update page, customize your email subject and body to let the pre-order customers know that this is their download link and their wait is over.
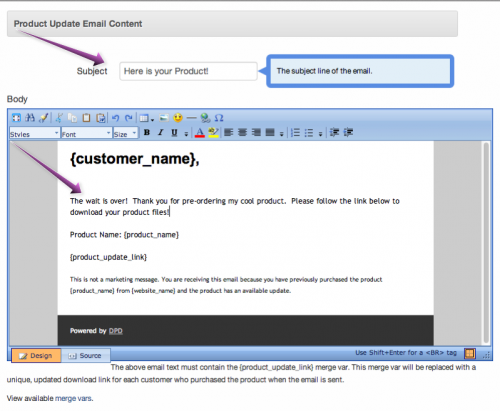
Note: Since in theory all buyers of the product before this date are pre-order customers, there is no need to manipulate the filters on the send product update page. Leaving the filters blank will send the updated file to all pre-order customers.
4. Preview the email and send. DPD will queue the product update email up for delivery and send it, usually within 20 minutes. Because of the potential for huge numbers of product update emails being sent at once, we queue these emails and send them in a metered fashion to prevent excessive load.
Your Pre-Order Buyers Now Have Their product!
When a product update is sent DPD re-evaluates the purchase actions that are assigned to the product. DPD will automatically see that the pre-order message has been removed and a file added, then update every pre-order customer’s purchase to reflect the new product file. This means that when they get their product update email and go to the download page they won’t see the pre-order message anymore; they’ll see the the download link instead!
All pre-order buyers will now receive your product update email with their own unique, activated download link to grab your product file.
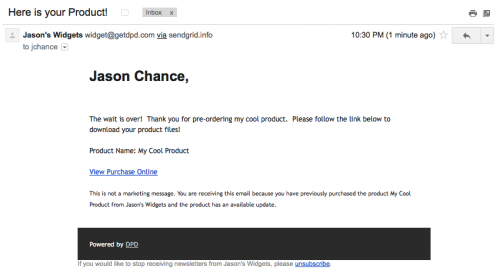
When they follow the download link in the email, they’ll be taken to their personal download page to grab the file you released:

Selling a pre-order product has quite a few steps, but none of them are complicated and they follow a logical process once you understand how DPD allows you to update existing products and then send those updates out to buyers. We’re basically creating a dummy product, letting people buy it, and then giving them the actual product file once its released. By using the same product, we make sure that all pre-order buyers (as well as all future buyers going forward) get the product file and any future updates you may make to the same product.
If anyone has any questions or needs any clarification on the process please drop us a line in the comments below or send us a support ticket- we’ll be glad to help!


